|
Pelatihan
Dasar Mikrokontroller
14-15 April 2007
Surabaya
Rp. 300.000
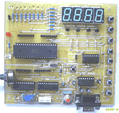
Microcontroller Kits
Programmer
and Target 89s51
Rp.100.000
(USD $10)
Simple
Mikrokontroller 89s51 Trainer
Rp, 350.000
(USD $35)
Standart
Mikrokontroller 89s51 Trainer
Rp. 650.000
(USD $65)
Super
Mikrokontroller Trainer 89s51
Rp.1.250.000
(USD $125)
 |
|
BACK
NEXT
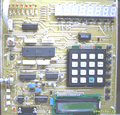
2.4. LCD Character 2 x 16
The LCD Module can easily be used with an 8051 microcontroller such as
the AT89s51. The LCD Module comes with a 16 pin connector. This can be
plugged into connector 16 pin. The pins on the 16 pin connector of the
LCD Module are defined below.

Figure 2.4.1 LCD Character 2 x 16 Module
PIN |
Name |
Function |
1 |
VSS |
Ground voltage |
2 |
VCC |
+5V |
3 |
VEE |
Contrast voltage |
4 |
RS |
Register Select
0 = Instruction Register
1 = Data Register |
5 |
R/W |
Read/ Write, to choose write or read mode
0 = write mode
1 = read mode |
6 |
E |
Enable
0 = start to lacht data to LCD character
1= disable |
7 |
DB0 |
LSB |
8 |
DB1 |
- |
9 |
DB2 |
- |
10 |
DB3 |
- |
11 |
DB4 |
- |
12 |
DB5 |
- |
13 |
DB6 |
- |
14 |
DB7 |
MSB |
| 15 |
BPL |
Back Plane Light |
16 |
GND |
Ground voltage |
LCD Character Background
The LCD Character standard requires 3 control lines as well as either
4 or 8 I/O lines for the data bus. The user may select whether the LCD
is to operate with a 4-bit data bus or an 8-bit data bus. If a 4-bit data
bus is used the LCD will require a total of 7 data lines (3 control lines
plus the 4 lines for the data bus). If an 8-bit data bus is used the LCD
will require a total of 11 data lines (3 control lines plus the 8 lines
for the data bus).
The three control lines are referred to as EN, RS, and RW.
The EN line is called "Enable." This control
line is used to tell the LCD that you are sending it data. To send data
to the LCD, your program should make sure this line is low (0) and then
set the other two control lines and/or put data on the data bus. When
the other lines are completely ready, bring EN high (1) and wait for the
minimum amount of time required by the LCD datasheet (this varies from
LCD to LCD), and end by bringing it low (0) again.
The RS line is the "Register Select" line.
When RS is low (0), the data is to be treated as a command or special
instruction (such as clear screen, position cursor, etc.). When RS is
high (1), the data being sent is text data which sould be displayed on
the screen. For example, to display the letter "T" on the screen
you would set RS high.
The RW line is the "Read/Write" control line.
When RW is low (0), the information on the data bus is being written to
the LCD. When RW is high (1), the program is effectively querying (or
reading) the LCD. Only one instruction ("Get LCD status") is
a read command. All others are write commands--so RW will almost always
be low.
Finally, the data bus consists of 4 or 8 lines (depending
on the mode of operation selected by the user). In the case of an 8-bit
data bus, the lines are referred to as DB0, DB1, DB2, DB3, DB4, DB5, DB6,
and DB7.
An Example Hardware Configuration
As we've mentioned, the LCD requires either 8 or 11 I/O lines to communicate
with. For the sake of this tutorial, we are going to use an 8-bit data
bus--so we'll be using 11 of the 8051's I/O pins to interface with the
LCD.
Comments,
questions and discussion about this topic
BACK NEXT
|
|
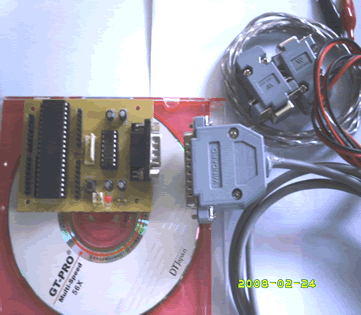
Programmer
ISP
89s
Free Software
a. Edsim 51
b. MIDE-51
c. ATMEL ISP
Lesson 1:
Architecture
1.1.Memory
1.2.SFR
1.3.Addressing
1.4.Instruction
Set
1.5.Assignment
Lesson 2:
Input Output
2.1.LED
2.2.Swicht
2.3.7
Segmen
2.4.LCD
Character
2.5.ADC
2.6.DAC
2.7.Motor
Stepper
2.8.Keypad
2.9.Assignment
Lesson 3:
Timer Counter
3.1.Basic
3.2.Mode
0
3.3.Mode
1
3.4.Mode
2
3.5.Mode
3
3.5.Assignment
Lesson 4:
Serial Comm.
4.1.Basic
4.2.LED
4.3.Rotate
LED
4.2 ADC
4.3.LCD
4.4.Assignment
Lesson 5:
Interuption
5.1.Basic
5.2.Timer
5.2.External
5.3.Assignment
|
